
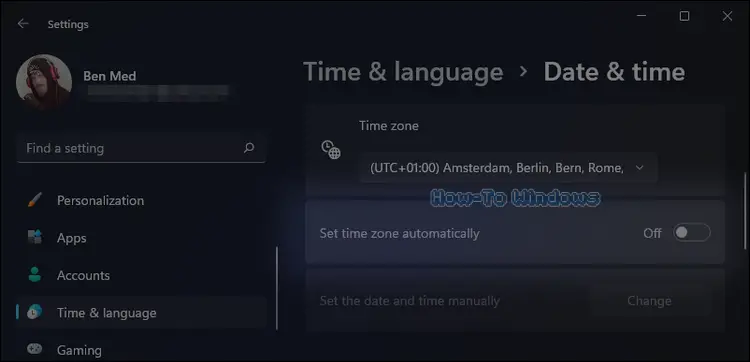
Have you ever tried to set your time zone automatically, so Windows 11 can show your current time correctly, but found that the ‘Set time zone automatically’ setting is greyed out, and you can’t turn it On? This can be frustrating, as it means Windows 11 won’t set your time zone automatically to match your current location.
But we’re here to help! In this article, we’re going to give some easy steps to follow to overcome this inconvenience of Set time zone automatically greyed out Windows 11 operating system.
Why Is Set Time Zone Automatically Greyed Out Windows 11
Starting with Windows 10 build 19582.1001, Microsoft has updated the ‘Set time zone automatically‘ toggle in Time & Date settings to be greyed out if Location services has been disabled.
So, if the ‘Set time zone automatically’ toggle is greyed out, it’s because your Windows 11 Privacy settings, and to be more specific the Location settings, don’t allow Windows 11 and its apps to access your computer’s location. Therefore, Windows 11 can’t determine your location and obviously can’t set your time zone automatically, so it grays out the option and make it unavailable by default.
Read also: What Is The Best Program to Open ZIP Files [Tested & Compared]
How to Make the Set time zone automatically Setting Available in Windows 11
As we stated before, this inconvenience situation of the Set time zone automatically setting appears to be greyed out in Windows 11, is because the Location services setting has been disabled, and the fix would be enabling the Location services setting.
Option #1 Enable Location Services Through Settings in Windows 11
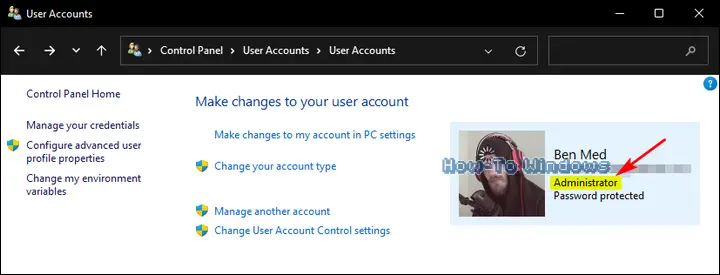
Step 01: Make sure you have Administrator Privileges (You must be signed in with an Administrator account).
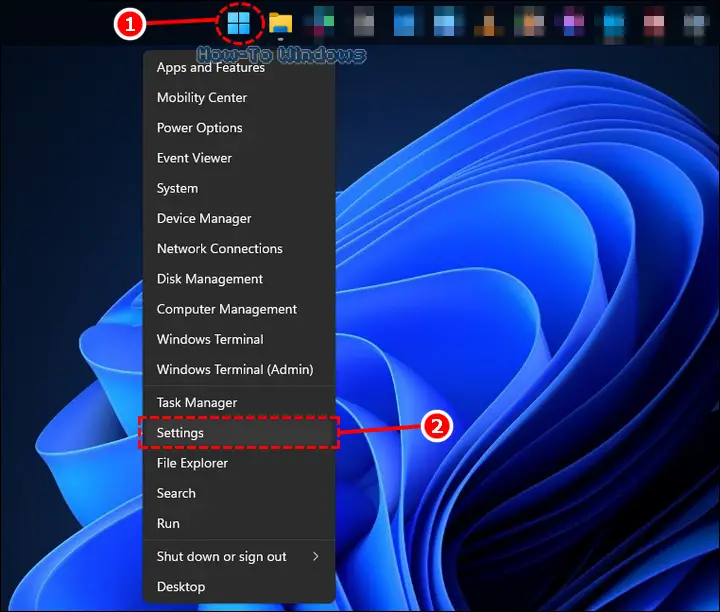
Step 02: From the keyboard, hit the Windows + i keys altogether to open the Settings app. OR, right-click on the Start button and select Settings from the list.
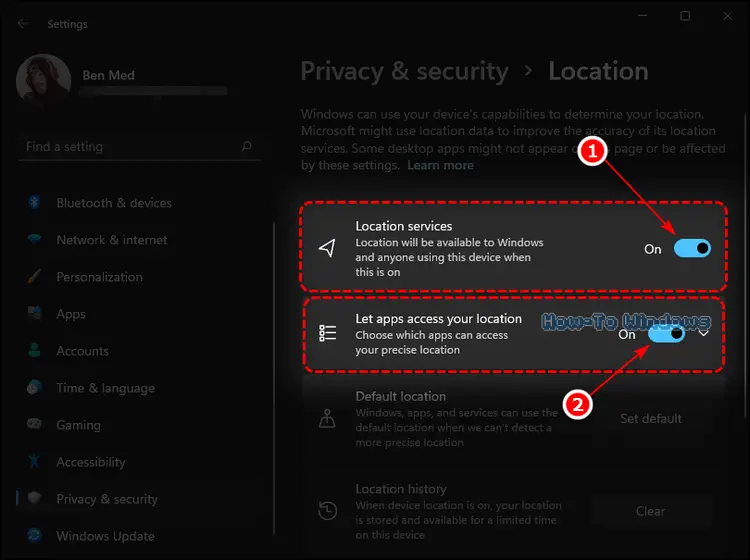
Step 03: From the left side pane, select Privacy & security, then scroll down to the App permissions section and click Location.
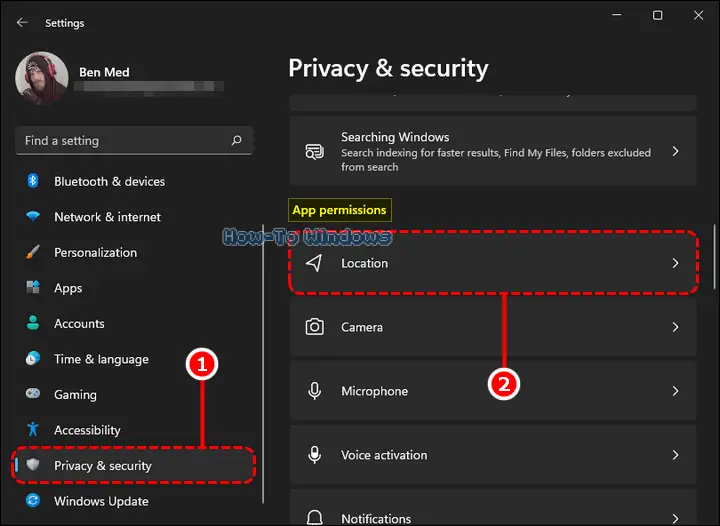
Step 04: Now, turn On the Location services setting, and make sure to turn On the Let apps access your location setting as well.
Done!! This is how you enable Location services through the Settings app in Windows 11.
Option #2 Enable Location Services Through Registry Editor in Windows 11 (In Case Option #1 Didn’t Work)
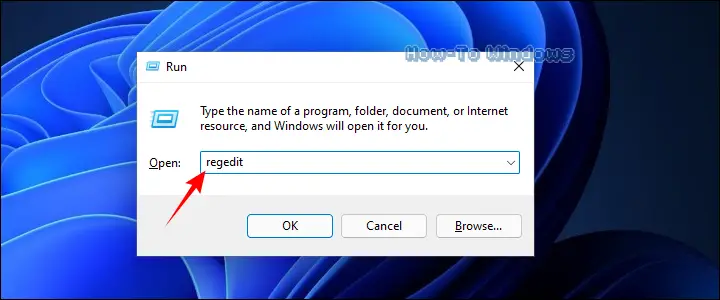
Step 01: Open Registry Editor through the Run command window by hitting the Windows + R keys altogether from the keyboard, then type regedit and hit the Enter key.
Step 02: Upon the launch of the UAC prompt, click Yes.
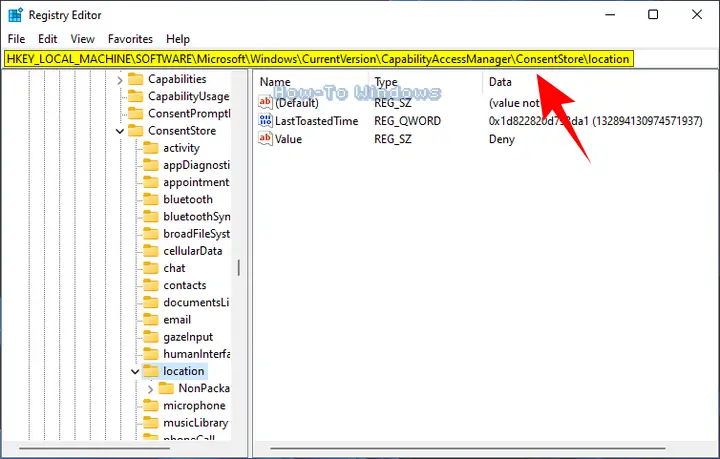
Step 03: Copy the following path and paste it inside the address bar above, and hit the Enter key from the keyboard to navigate to the intended registry key.
HKEY_LOCAL_MACHINE\SOFTWARE\Microsoft\Windows\CurrentVersion\CapabilityAccessManager\ConsentStore\location
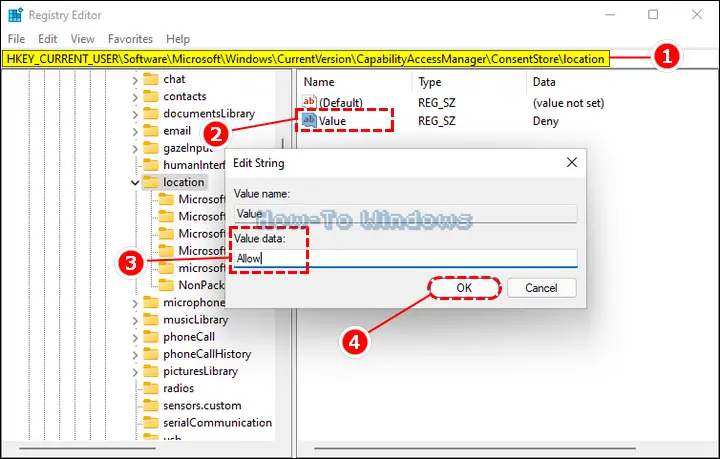
Step 04: Now, double-click on the Value registry string, and set Value data to Allow for enabling the Location services setting, then click OK to save the changes.

Step 05: Next, and in the same Registry Editor window, copy and paste the following path inside the address bar and hit Enter.
HKEY_CURRENT_USER\Software\Microsoft\Windows\CurrentVersion\CapabilityAccessManager\ConsentStore\location
Step 06: In the same way as in step 5, double-click on the Value registry string, and set Value data to Allow for enabling the Let apps access your location setting, then click OK to save the changes again, and close the Registry Editor window.
Now we’re done, and this is how you enable Location services through Registry Editor in Windows 11.
How to Turn On the Set time zone automatically Setting in Windows 11
Option #1 Using the Settings App
Instantly, the “Set time zone automatically” setting will be available after you complete the previous step, which means you can now turn On the Set time zone automatically setting in Windows 11 easily through the Settings app without facing the annoyance “greyed out” situation. To do so, follow these steps:
Step 01: You must be signed in with an Administrator account.
Step 02: Open Settings by hitting the Windows + i keys altogether from the keyboard.
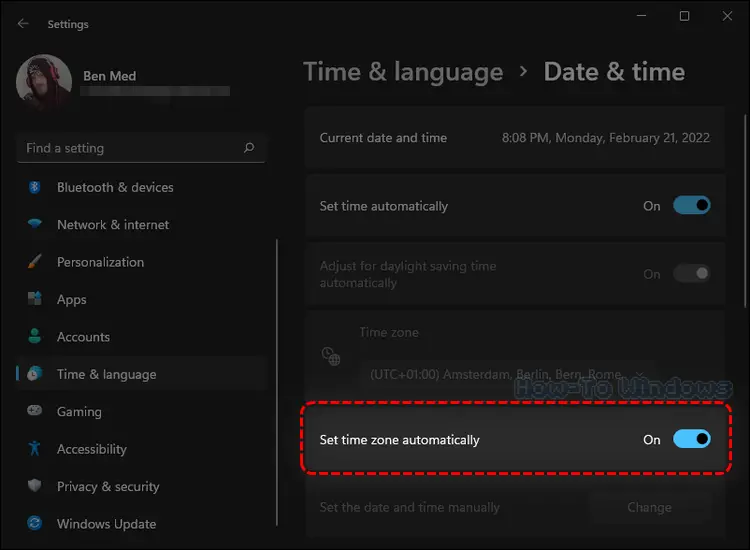
Step 03: Click on Time & language from the left side pane, then click on Date & time.

Step 04: Finally, turn On the Set time zone automatically setting, and that’s it!!
Option #2 Using Registry Editor (In Case Option #1 Didn’t Work for You)
Step 01: Hit the Windows + R keys altogether, then type regedit and hit Enter key.
Step 02: Upon the launch of the UAC prompt, click Yes.
Step 03: Copy and paste the following path into the address bar, and hit Enter.
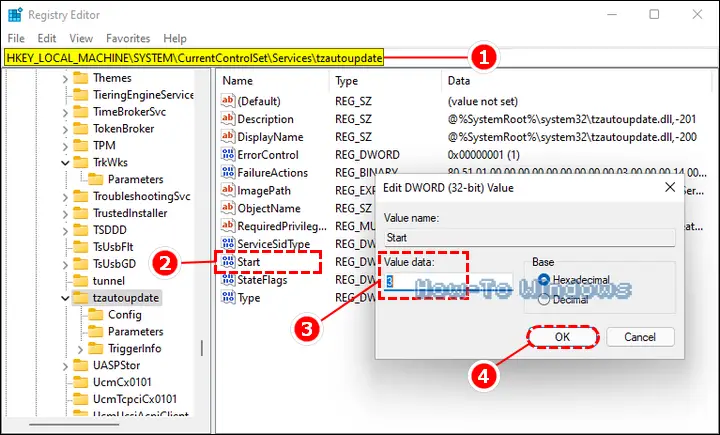
HKEY_LOCAL_MACHINE\SYSTEM\CurrentControlSet\Services\tzautoupdate
Step 04: Double-click on the Start registry string, and set Value data to 3 to turn On the Set time zone automatically setting, then click OK to save the changes, and that’s it!!
Bottom Line
We hope you enjoyed the article about how to overcome this inconvenience situation in Windows 11. We understand how important the ‘Set time zone automatically’ setting is, and how frustrating it can be if you can’t get it to work, so we thought it was a good idea to post an article about it! If you have any other questions about Windows 11, please comment down below. We’re always happy to help!