

As you already know, Windows 11 is the most recent version of the widely used Windows operating system, and like every new operating system release, it offers a ton of new features and enhancements. However, Many users are reporting the contrary and facing more problems than usual. One common frustrating issue is that your computer may begin to function slowly after upgrading to Windows 11.
The good news is that you can do something about it, and you can speed up your Windows 11 performance by following some practical tips.
In this article, you will learn how to speed up a laptop Windows 11 using 3 simple tips.
How to Speed up a Laptop Windows 11
- Keep Your Operating System Up To Date
- Disable Animations and Visual Effects
- Disable Startup Programs & Apps
Why is Windows 11 so laggy? [Causes of Slow Windows 11 Laptop]
Before we get into how to speed up a Laptop Windows 11, let’s have a look at why your Windows 11 Laptop is so sluggish. Generally, The causes of this problem typically vary from user to user and cannot be pinpointed to a single fixed factor.
Consequently, the following are the most frequent reasons why a Windows 11 machine is so laggy and slow:
- Not enough storage space available
- Viruses or malware infections
- Outdated drivers or software
- Outdated hardware
- Too many apps operating in the background
Read also: [Solved] Set time zone automatically Greyed Out Windows 11
Tip 01: Keep Your Operating System Up To Date
Many users downplay the significance of system updates, but in truth, operating systems like Windows are continuously in need of fresh updates. Why? Mainly because software updates come with bug fixes, security patches, and even new features.
Therefore, by maintaining an updated operating system, you can be sure that your computer is functioning at its peak efficiency and security.
Additionally, since system updates are cost-free, there is no excuse for not routinely updating your operating system.
Making ensuring your Windows 11 operating system is up-to-date is as easy as following these simple steps:
Step 01: Press the shortcut (Windows + I) from your keyboard to open the Settings app.
Step 02: from the left-side pane, scroll down until you find Windows Update, click on it.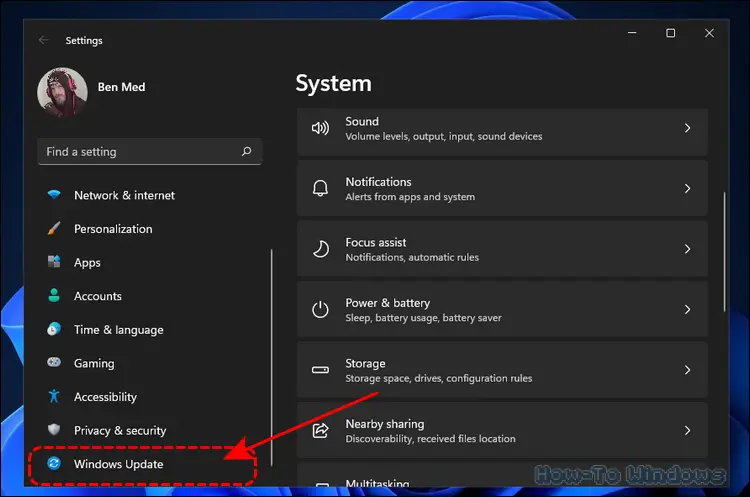

Step 03: Finally, click the Check for updates button and wait a few minutes while your OS searches for any new updates. If any are found, the Download now button will show up; click it, then wait while the most recent Windows 11 updates get downloaded and installed. The device will then need to be restarted, so do so.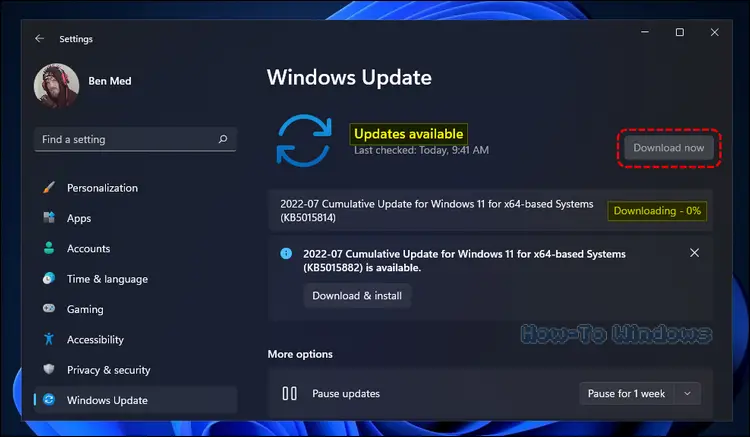

Thus, this is the process of keeping your Windows 11 OS up to date.
Tip 02: Disable Animations and Visual Effects
Windows 11 offers a variety of animations and visual effects that can be enabled or disabled. While enabling these features might improve the operating system’s aesthetic appeal and make it appear cool, it can also drastically drain system resources, resulting in decreased performance. On the other hand, disabling these features can speed up your Windows 11 machine and give you better performance, especially if you have old or less powerful hardware.
So that your Windows 11 laptop runs more smoothly, I suggest that you turn off or disable animations and visual effects. To do so, follow these steps:
Step 01: Open the Settings app by pressing the (Windows + I) keys altogether from your keyboard.
Step 02: Click on Personalization from the left-side pane, then click on Colors.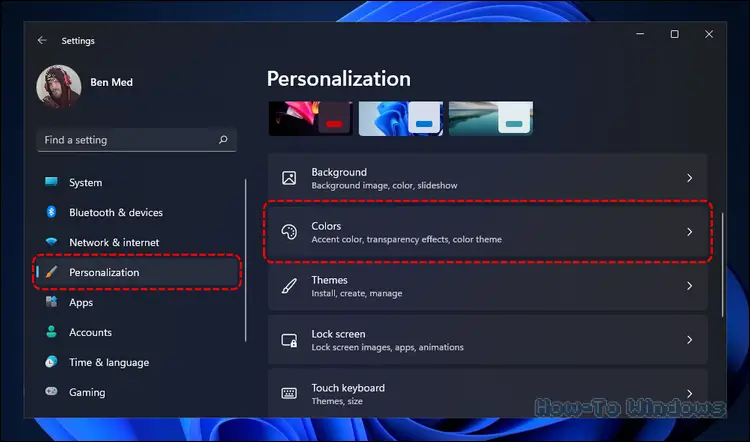

Step 03: Disable the Transparency effects toggle.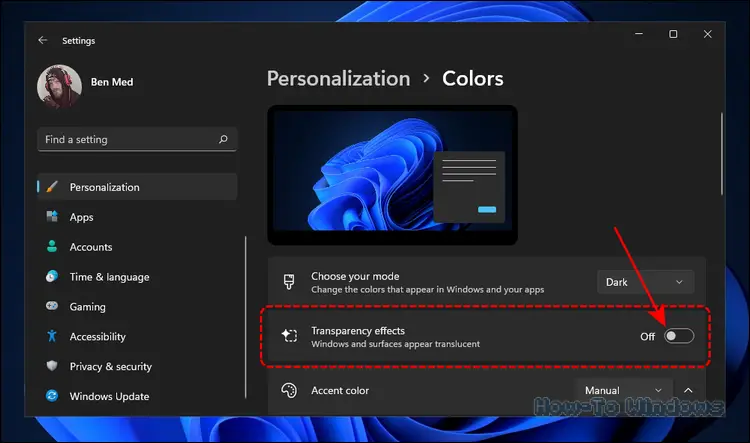

Step 04: Next, Click on Accessibility from the left-side pane. Then, click on Visual effects.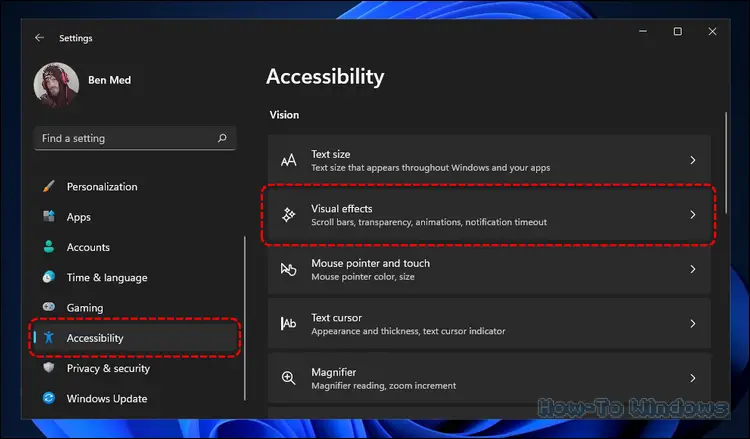

Step 05: Now disable Transparency effects and Animation effects altogether.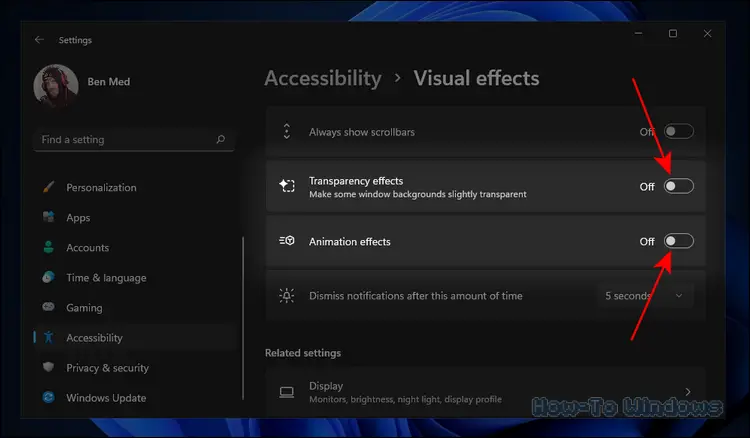

Step 06: After that, open the Run command box by pressing the (Windows + R) keys altogether from your keyboard, then typing sysdm.cpl and hitting Enter. 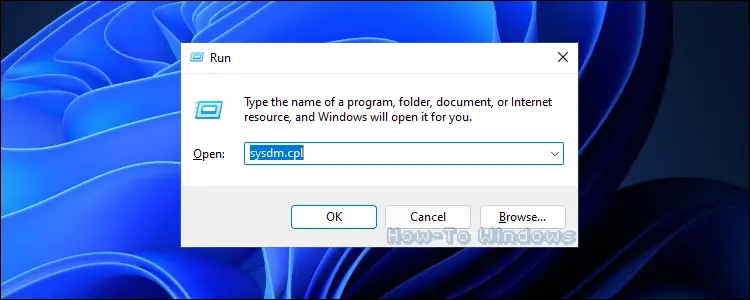

Step 07: On the System Properties window, click on the Advanced tab. Then, click on Settings under Performance.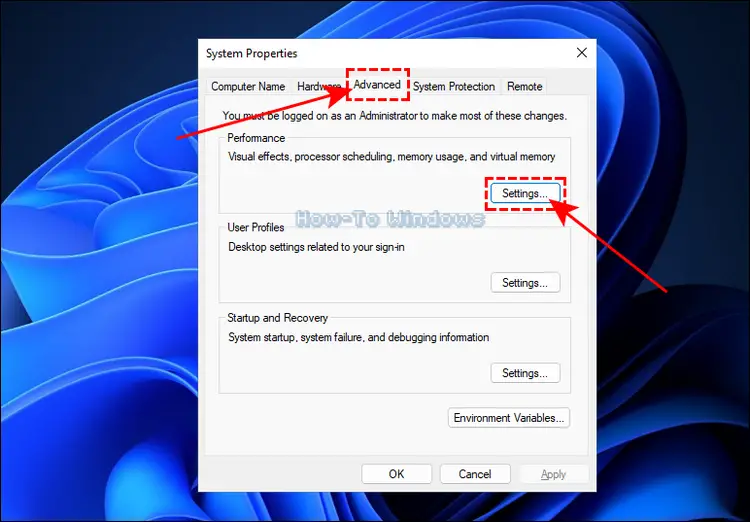

Step 08: Finally, on the Performance Options window, click Adjust for best performance, and then click OK. DONE!!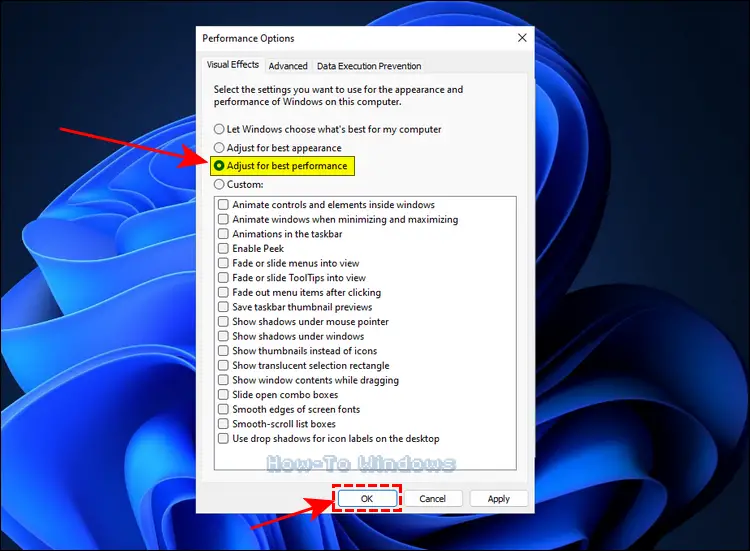

Tip 03: Disable Startup Programs & Apps
Windows 11 has a lot of programs and built-in apps that start up when you turn on your laptop. These programs and apps remain running continuously in the background without your awareness, using a lot of system resources and resulting in decreased system performance.
Therefore, disabling unnecessary startup items (programs & apps) can free up system resources and improve overall Windows 11 performance. Additionally, this step will speed up your laptop’s startup time.
Here are the steps to disable startup programs & apps on Windows 11:
Step 01: Open the Settings app by pressing the (Windows + I).
Step 02: Click on Apps from the left-side pane, then click on Startup.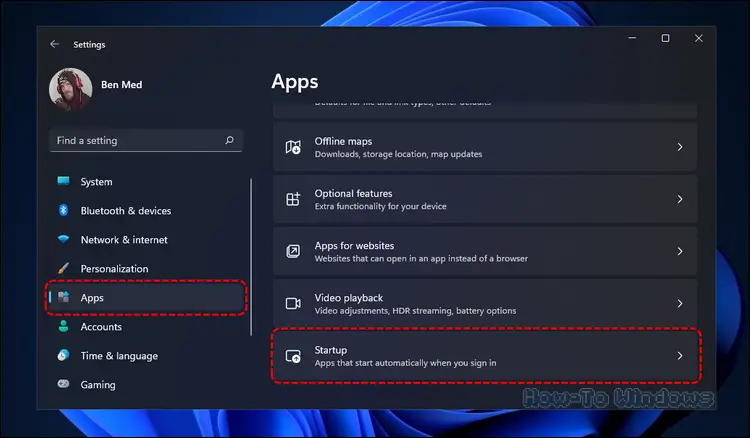
Step 03: Now, turn off all the unnecessary startup apps.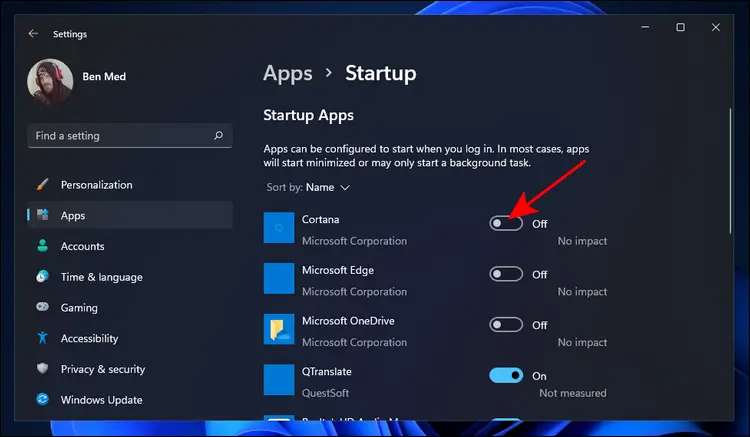
Step 04: Next, right-click on the Start button and select Task Manager.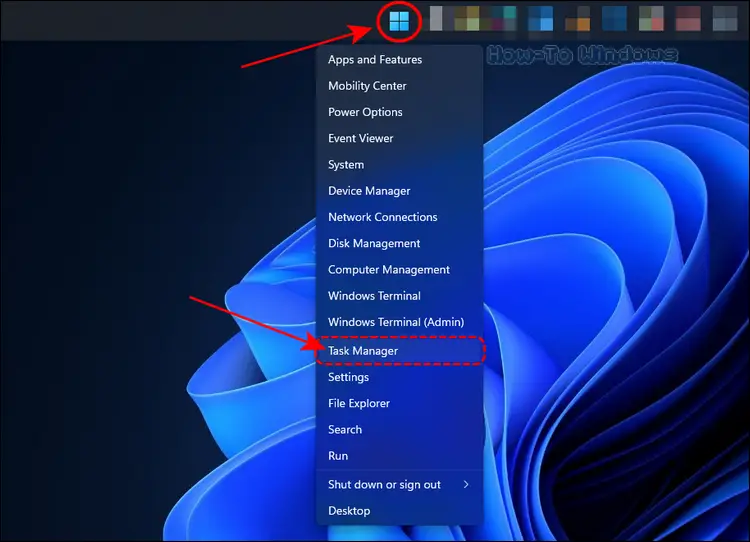

Step 05: On the Task Manager window, click on the Startup tab. Then right-click any item and select Disable to turn the program off.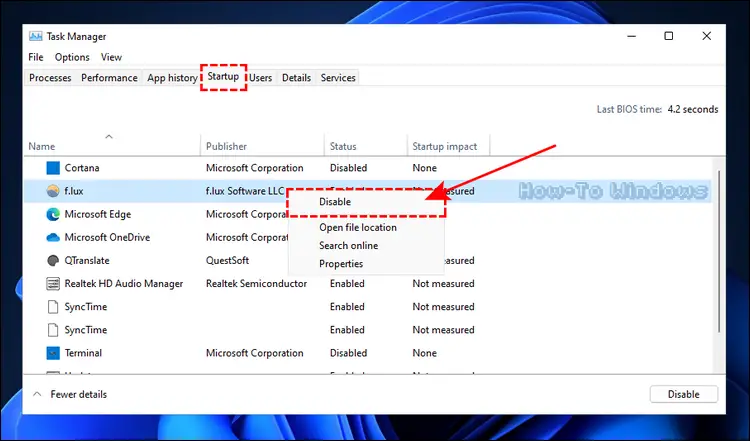

Bottom Line
If you’re experiencing slow performance on your Windows 11 laptop, and you want to learn how to speed up a laptop Windows 11, try following the tips in this blog post. With a little effort, you can get your laptop running at peak performance again. Thanks for reading!
If you have any questions or suggestions about this topic, feel free to leave a comment below.
