

Dell is a well-known brand for having great products, and their Latitude laptop series is a great example of its success. However, problems can happen even with top-line products.
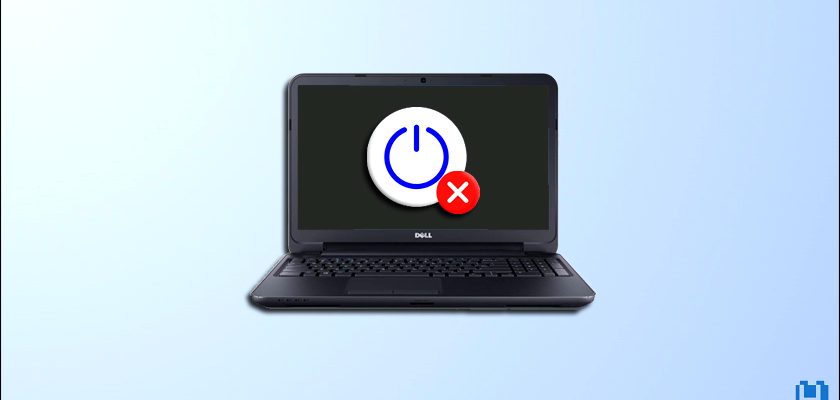
Recently, many Dell Latitude 5420 owners have experienced issues getting their laptops to turn on normally as they should; when they try and press the power button, nothing happens and the laptop just won’t turn on.
If you’re in this situation, don’t worry.
In this article, I’ll show you how to troubleshoot and fix this problem on your own before contacting computer technicians.
Why Won’t My Dell Latitude 5420 Turn On?
Well, to answer your question specifically, I have to conduct some tests on your laptop. However, since that’s not possible, I will just list the most common reasons why a Dell laptop won’t turn on:
- Residual or static electricity
- Drained or dead battery.
- Faulty AC power adapter.
- Dead power outlet.
- Defected RAM modules.
- Power button malfunction.
- Electrical interferences.
- BIOS issue.
- Faulty or dead motherboard.
7 Solutions to Fix a Dell Latitude 5420 That Won’t Turn On:
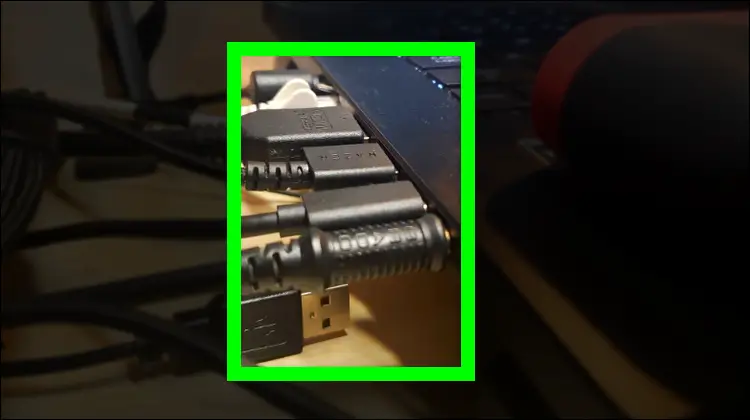
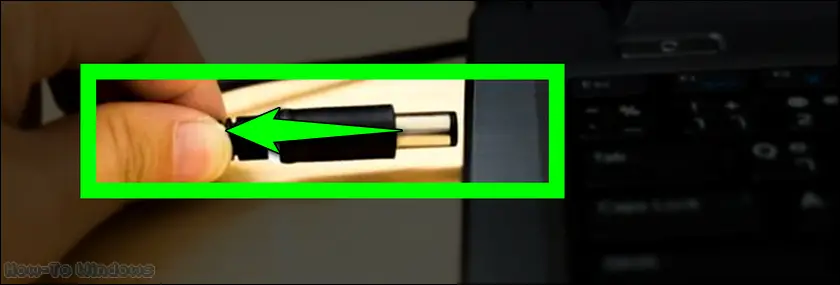
Fix 01 – Disconnect Any External Devices Connected to Your Laptop
Plugging any external equipment such as an external storage device, keyboard, mouse, USB Wi-Fi adapter, printer, etc., into your laptop, might potentially cause an electrical conflict between your laptop’s internal components, which can lead to a system failure as electronic parts are too sensitive to the slightest electrical interference.

Not just that, but also after pressing the power button on your laptop, your system will need to recognize all of your connected storage devices, and then find which drive carries the operating system to properly Boot from.
So, connecting multiple external storage devices (HDD, SSD, USB Flash Drive…) to your laptop will slow down and affect this process where your laptop tries to boot from the wrong storage device, thereby entirely preventing your laptop from turning on.
For these reasons, It’s always recommended to unplug any external or peripheral device from your laptop before attempting to power it ON.
Fix 02 – Perform a Power Drain on Your Dell Laptop
Power-draining your laptop is one of the easiest and most effective solutions when it comes to power issues.
“Why is that?”
Because your laptop’s motherboard, particularly the capacitors, may retain or hold residual power even when the machine is off; this could interfere with the normal flow of power or electricity within the motherboard, preventing the laptop from powering on.


To perform a power drain on your Dell Latitude laptop, follow these steps:
Step 01: Unplug the AC power adapter and any external devices.

Step 02: Since your laptop doesn’t have a removable battery, flip your laptop over and take off the screws to remove the back cover.


Step 03: Now, disconnect the battery connector carefully.


Step 04: Now, press and hold the power button for about 30 seconds to drain the residual power or electricity.


Step 05: Wait around 5 minutes before reinstalling the battery and back cover.
Step 06: Plug the AC power adapter back into your laptop.

Step 07: Finally, press the power button to see if your Dell Latitude 5420 turns on successfully.
Fix 03 – Check The Battery Status Light
The Dell Latitude 5420 has a small LED light on the front right corner of the laptop that indicates the current battery’s state, power condition, and charging status of the laptop.


The current power and battery status of your laptop depends on the color shown by this LED light as follows:
Solid white: The battery has more than 5 percent charge and the the power adapter is correctly connected.
Solid orange: The laptop is running on battery and the battery has less than 5 percent charge.
Off:
- Laptop is in sleep mode, Hibernated, or completely turned off
- The battery is fully charged and the power adapter is connected
- The laptop is running on battery and the battery has more than 5 percent charge
“But what does it mean if this LED light indicator is blinking orange and white along with beep codes”
If this is the case for you, this means you’re facing a motherboard or hardware failure.
Each blinking pattern indicates a different type of error or problem, for example, 2 orange flashes followed by 1 white flashes indicates a CPU failure.
Now, to access the full list of all possible blinking patterns, what they imply, and what solutions you can try; check the Dell Latitude 5420’s System diagnostic lights page.


Fix 04 – Perform A Built-In Self-Test
The Dell Latitude 5420 motherboard has a built-in self-test diagnostics tool called M-BIST (Motherboard Built-In Self-Test).
“What does this M-BIST diagnostics tool do?”
M-BIST checks the motherboard’s health and specifically checks for the microcontroller chip called embedded controller (EC) failures, which can lead to many different issues including the inability to power on the laptop, insufficient battery charging, improper fan operation, boot errors or failure, and BIOS corruption.
M-BIST is designed to operate before POST (Power-On Self-Test) and even if you have a dead system.
To run M-BIST on your Dell Latitude 5420, follow these steps:
Step 01: Connect your laptop to the AC power adapter.
Step 02: Press and hold both the M key + the power button on the keyboard.


Step 03: While both the M key and the power button are pressed, the battery-status indicator light will display two states:
- OFF/not illuminated: No motherboard failure detected.
- Amber/orange: Indicates a motherboard issue.
Now, the nature of the problem is dependent on the blinking pattern displayed by your laptop’s battery-status LED as follows:
- 2 Orange + 1 White = CPU Failure
- 2 Orange + 8 White = LCD Power Rail Failure
- 1 Orange + 1 White = TPM Detection Failure
- 2 Orange + 4 White = Unrecoverable SPI Failure
Fix 05 – Check The Power Supply
Electronic devices are so sensitive, and your laptop will probably not turn on if the AC power adapter or its connections and cables are faulty, damaged, or loose.
For that reason, you should check if your cables are properly plugged in, and then inspect them for any visible cuts/bends or damage.

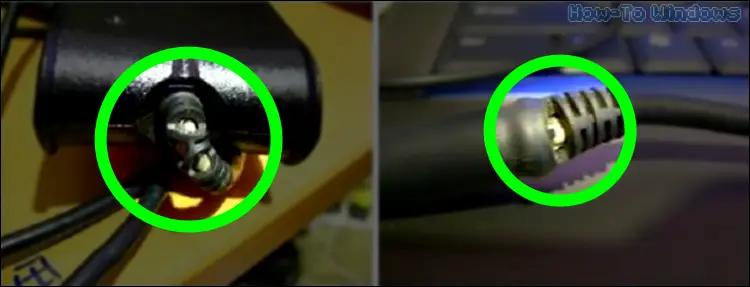
Also, make sure that the LED light on your AC power adapter (brick or plug) is blinking in green or orange and is not completely dimmed.


If you have a faulty adapter or connection, just replace the power adapter with a new compatible one.
Fix 06 – Reset BIOS settings
A messed-up BIOS setup = boot problems, instability, etc.
Resetting your BIOS setup to default settings is mandatory if your laptop is failing to turn on, boot, or post.
Now, the only way of resetting your BIOS settings while your computer is turned off is by clearing and reseating the CMOS battery.
To reset your motherboard’s BIOS settings follow these steps:
Step 01: For your safety and the protection of your laptop, unplug the power cord and any external devices.
Step 02: Remove the back panel of your laptop to access your motherboard.
Step 03: Disconnect the battery connector carefully.
Step 04: In the Dell Latitude 5420 module, the CMOS battery sits beneath the motherboard; therefore, you must locate its JRTC1 port and detach its connector with caution.


Step 05: Next, reattach the CMOS battery connector back in its port.
Step 06: Reconnect the battery and reinstall the laptop’s back panel.
Now, connect your laptop to power, switch it on, and see whether it turns on.
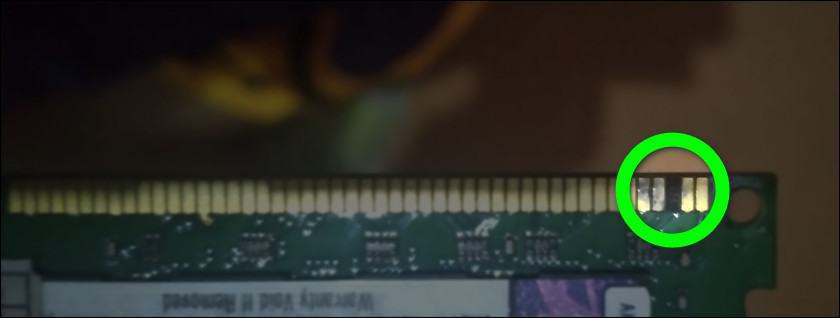
Fix 07 – Check Your RAM Modules
A faulty RAM module can be responsible for a large amount of hardware-related problems such as black screens, computers not turning on, no boot, beeping sounds, etc.
Checking your RAM modules is the best way to clear any doubt about them being the source of the issue.
To check your memory modules follow these few simple steps:
Step 01: Disconnect the power cord and every other cable connected to your laptop.
Step 02: Unscrew and remove the back panel to get to the RAM sticks.
Step 03: Unplug the battery connector before moving on to the next step.
Step 04: Locate your RAM modules and remove them by releasing their latches. (Note: hold the RAM sticks by their edges to avoid touching the connectors)


Step 05: Now, inspect the RAM sticks for any visible damage, such as burns.

Step 06: Clean your RAM sticks using a compressed air canister or a cold hair dryer then wipe them using a soft cloth.


Step 07: Don’t neglect to also clean the RAM slots; you can use compressed air and a toothbrush.

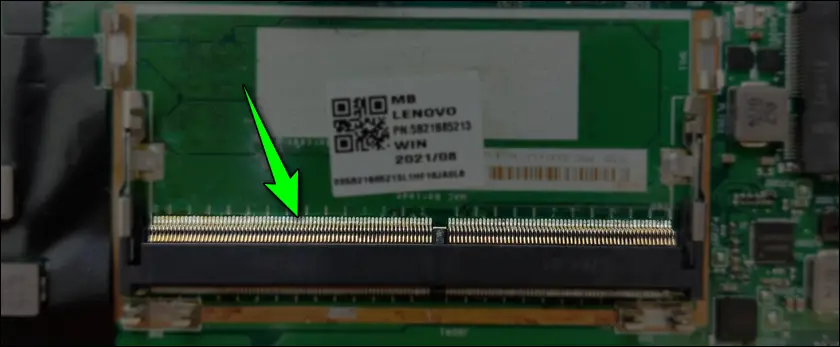
Step 08: Now, reinsert the RAM sticks back into their slots, and make sure they are seated properly.
PRO TIP: If your laptop has two RAM sticks, remove one and try turning it on with just one along with switching the slot. Try the same thing with the other RAM stick.
If your Dell Latitude 5420 still won’t turn on, you need to seek the help of a professional computer technician.
Conclusion
Most of these solutions mentioned above will probably fix your issue. However, if you still can’t get your Dell Latitude 5420 to power on, then we recommend seeking professional help and assistance.
And if your laptop is still under warranty, then you can always contact Dell customer support service and you might benefit from a free full repair service.
