


Is the power button on your Lenovo laptop flashing/blinking but the machine is not turning on?
This is a common problem with laptops in general, and specifically with Lenovo laptops.
When users encounter this problem, they frequently panic and assume that their beloved laptop has died.
But in reality, it’s a fixable problem that you can take care of on your own by just following our comprehensive guide.
In this guide, I will show you how to troubleshoot this issue and get your Lenovo laptop to turn on properly again.
But first, let me tell you…
What Does a Flashing or Blinking Power Button on a Lenovo Laptop Mean?


The light indicator in the center of the power button indicates the computer’s system state.
Now, when this light indicator is flashing or blinking, it can mean different things based on the type of flashing:
- Flashes three times: The laptop is initially connected to power.
- Fast flashing: The battery capacity is between 1% and 20%, so the laptop will soon enter sleep or hibernation mode (as configured).
- Slow flashing: The laptop is in sleep mode.
Causes for Lenovo Power Button Blinking but Not Turning On
Without looking at the laptop and running certain tests, it’s quite difficult for me to pinpoint the true cause of this problem.
However, the following are the most commonly known causes of this issue:
- The battery may be drained or faulty.
- The AC power adapter is faulty.
- The RAM is loose or defective.
- System bugs or glitches.
- The motherboard may have a short circuit or a damaged component.
- The power button is stuck or broken.
- The BIOS may be corrupted or need an update.
- Your laptop is infected by malware.
6 Troubleshooting Steps to Fix This Issue and Get Your Lenovo Laptop to Turn On
Fix 01 – Power Reset your Lenovo Laptop
A power rest involves shutting down the laptop completely, disconnecting it from its power source, and then draining it off power before powering it back again.
I always start my troubleshooting steps by performing a power reset on the machine, as it gives the laptop a fresh start and clears any temporary bugs, glitches, or electrical interference that might be the root cause of this issue.
The method of performing a power reset varies based on whether your Lenovo laptop has a removable or non-removable battery.
If your Lenovo laptop has a removable battery follow these steps:
Step 01: Make sure your laptop is powered OFF completely.
Step 02: Disconnect any external devices.


Step 03: Unplug the AC/power adapter from the laptop and also unplug it from the wall socket.


Step 04: Flip the laptop and remove the battery.


Step 05: Press and hold the power button on the laptop for about 30 seconds to discharge any residual power from the laptop.


Step 05: Wait for another 60 seconds before reinserting the battery back into the laptop.
Step 06: Now, you can power ON your Lenovo laptop, then plug the AC adapter back and check if the laptop turns on normally.
If you have a Lenovo laptop with a non-removable battery but a reset pinhole, follow these steps instead:
Step 01: Make sure your laptop is powered OFF completely.
Step 02: Disconnect the power adapter.
Step 03: Flip your laptop over and look for the emergency-reset hole.


Step 04: Insert a straightened paper clip into the reset hole to power reset your laptop.
Step 05: Now, plug the AC adapter back into your laptop, turn it ON, and check if the issue is gone.
If you have a Lenovo laptop with a non-removable battery and no reset pinhole, follow these steps instead:
Step 01: Press and hold the power button down, wait for the laptop to shut down, and hold the power button down for another 15 seconds.
Step 02: Turn ON your laptop and check if the issue is still there.
Fix 02 – Verify That the AC Power Adapter Is Not Faulty
As you already know, the laptop needs electricity to operate and charge the battery. This power is provided by the AC power adapter.
Therefore, if the adapter is defective, it will not charge the laptop’s battery properly, and the laptop will rely solely on the remaining battery charge, and when it drains and reaches a low level, it will enter sleep mode and won’t be able to turn on fully.
This is most likely the case in cases observed by other users; when they press the power button, the laptop’s power button may temporarily flash or blink, but the laptop won’t turn on since there is not enough power to start up, and it appears to as if it turned on and off quickly.
Now, to determine whether the AC power adapter is defective, attempt the following:
Step 01: Inspect the AC adapter closely for any signs of damage, frayed wires, or loose connections.


Step 02: If possible, get another compatible AC adapter and test it with your Lenovo laptop; if the problem is resolved and your laptop operates normally with the replacement adapter, the original adapter is defective.


Step 03: Using a multimeter, check the output voltage of the AC adapter and compare the measurement to the power ratings (voltage) stated on the adapter’s label.


If the measured voltage is much lower or fluctuating, the adapter is defective and must be replaced.
Note: If you don’t know how to perform this step, simply bring your AC adapter to a repair shop and ask them to perform a quick test for free; I’m sure they won’t refuse.
Step 04: When purchasing a new AC adapter for your laptop, avoid incompatible, low-quality adapters that may cause additional problems. Additionally, check out the back of your original power adapter for recommended power ratings (input/output voltages) and ensure that they match the new AC adapter’s ratings.


Fix 03 – Check if the Battery Is Drained or Faulty
As you are aware, batteries have a finite lifespan and degrade over time; therefore, you should examine the battery, as it may be drained or faulty, resulting in your Lenovo laptop not turning on fully due to a lack of power.
When it comes to checking battery issues, most people would just advise getting a new battery and trying it, however this isn’t fully helpful.
Instead, I advise you to follow these steps, which will help you in diagnosing the issue, and determining whether the battery is the problem’s root cause and when it’s time to replace it:
Step 01: Connect the AC power adapter to your laptop and to the wall socket.

Step 02: Check the Battery status indicator, which tells the charging status of the battery, and if it’s:
- Green: The battery charge level is 20% or above.
- Orange: The battery is between 5% and 20% charged.
- Fast blinking orange: The battery charge level is 5% or less.
- Slow orange blinking: the battery is being charged.
- Slow green blinking: The battery charge level is between 20% and 80%. (When the battery charge level hits 80%, the battery status light stops blinking).


Step 03: Leave the laptop connected to the AC adapter for a sufficient amount of time (e.g., 1-2 hours). This guarantees that the battery is not completely drained.
Step 04: While the laptop is charging, keep an eye to see if the battery status indicator changes.
Step 05: Now, turn on your Lenovo laptop and check to see if the problem has been resolved.
Step 06: If it is not and your Lenovo laptop still won’t turn on, consider replacing the battery with a new one, and make sure it’s compatible with your laptop.


Fix 04 – Reseat The RAM Modules
RAM is an essential component for your laptop’s functionality, and if RAM sticks aren’t properly placed in their slots, are defective, or if there’s dirt accumulation on the RAM contacts and slots, this can result in major issues, such as failing to boot or turn on.
In order to rule out RAM as the cause of this difficult situation, do the following steps:
Step 01: Make sure your laptop is powered OFF completely.
Step 02: Unplug the AC power adapter and any peripherals connected to your laptop.
Step 03: Remove the battery if you have a removable one.
Step 04: To get to the RAM sticks, you’ll need to take off the bottom cover of the laptop.


Step 05: If you have a non-removable battery, you should unplug the battery cable before moving on to the next step.

Step 06: Release the latches holding the RAM sticks in place, then carefully pull them out of their slots (Make sure to hold the RAM sticks by their edges to avoid touching the connectors).


Step 07: Inspect the RAM sticks for any visible damage, such as burns. (If you see any, it may be time to replace them).


Step 08: Clean the RAM gold contacts with a soft cloth that won’t leave any fibers behind.


Step 09: Also, don’t forget to clean the RAM slots with a tooth brush.


Step 10: If there is a large amount of dust on the RAM sticks or slots, use an air compressor to clean it.
Step 11: Reinsert the RAM sticks back into their slots, and make sure they are seated properly.
Step 11: Reassemble your laptop back.
Step 12: Turn on your Lenovo laptop and see if it starts normally.
If the issue still persists and your Lenovo laptop still won’t turn on, try replacing the RAM sticks as they may be faulty or dead.
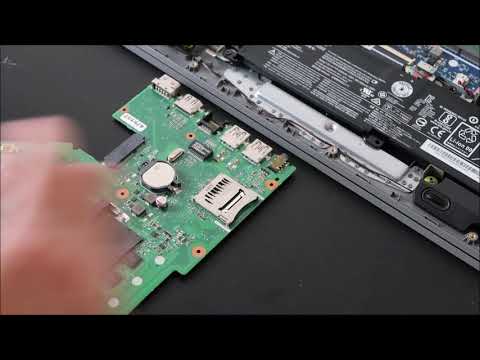
Fix 05 – Reset the Bios by Reseating the CMOS Battery
The BIOS (Basic Input/Output System) is firmware that contains low-level settings and configurations and is responsible for initializing and controlling hardware components during computer boot-up.
When the BIOS becomes corrupted, misconfigured or even outdated, it can cause issues with the laptop’s basic functionality, including the failure to turn on properly.
Therefore, resetting the BIOS by removing the CMOS battery for a few seconds helps to clear the BIOS settings & configurations and restore them to their factory defaults.
Since the process of reseating the CMOS battery on your Lenovo laptop can be complicated, it’s batter to follow a visual guide or a YouTube video:
Fix 06 – Seek Professional Help
There is a possibility that your Lenovo laptop’s motherboard has a short circuit or a damaged component, which requires a professional computer technician to inspect and repair, if found.
Therefore, if your laptop is no longer covered by its manufacturer’s warranty, you should seek help from a reputable computer repair shop, which will conduct the necessary repairs for you.
Conclusion
Having technical issues, such as a laptop that won’t turn on even though the power button is flashing, can be puzzling and leave you feeling stressed.
However, The good news is that a blinking light indicates that power is flowing through the motherboard of your laptop and that it’s not completely dead.
In this blog post, I’ve intended to provide you with troubleshooting steps that you can try before seeking help from an expert.
